Rookie project
Workshop - Building instructions
 |
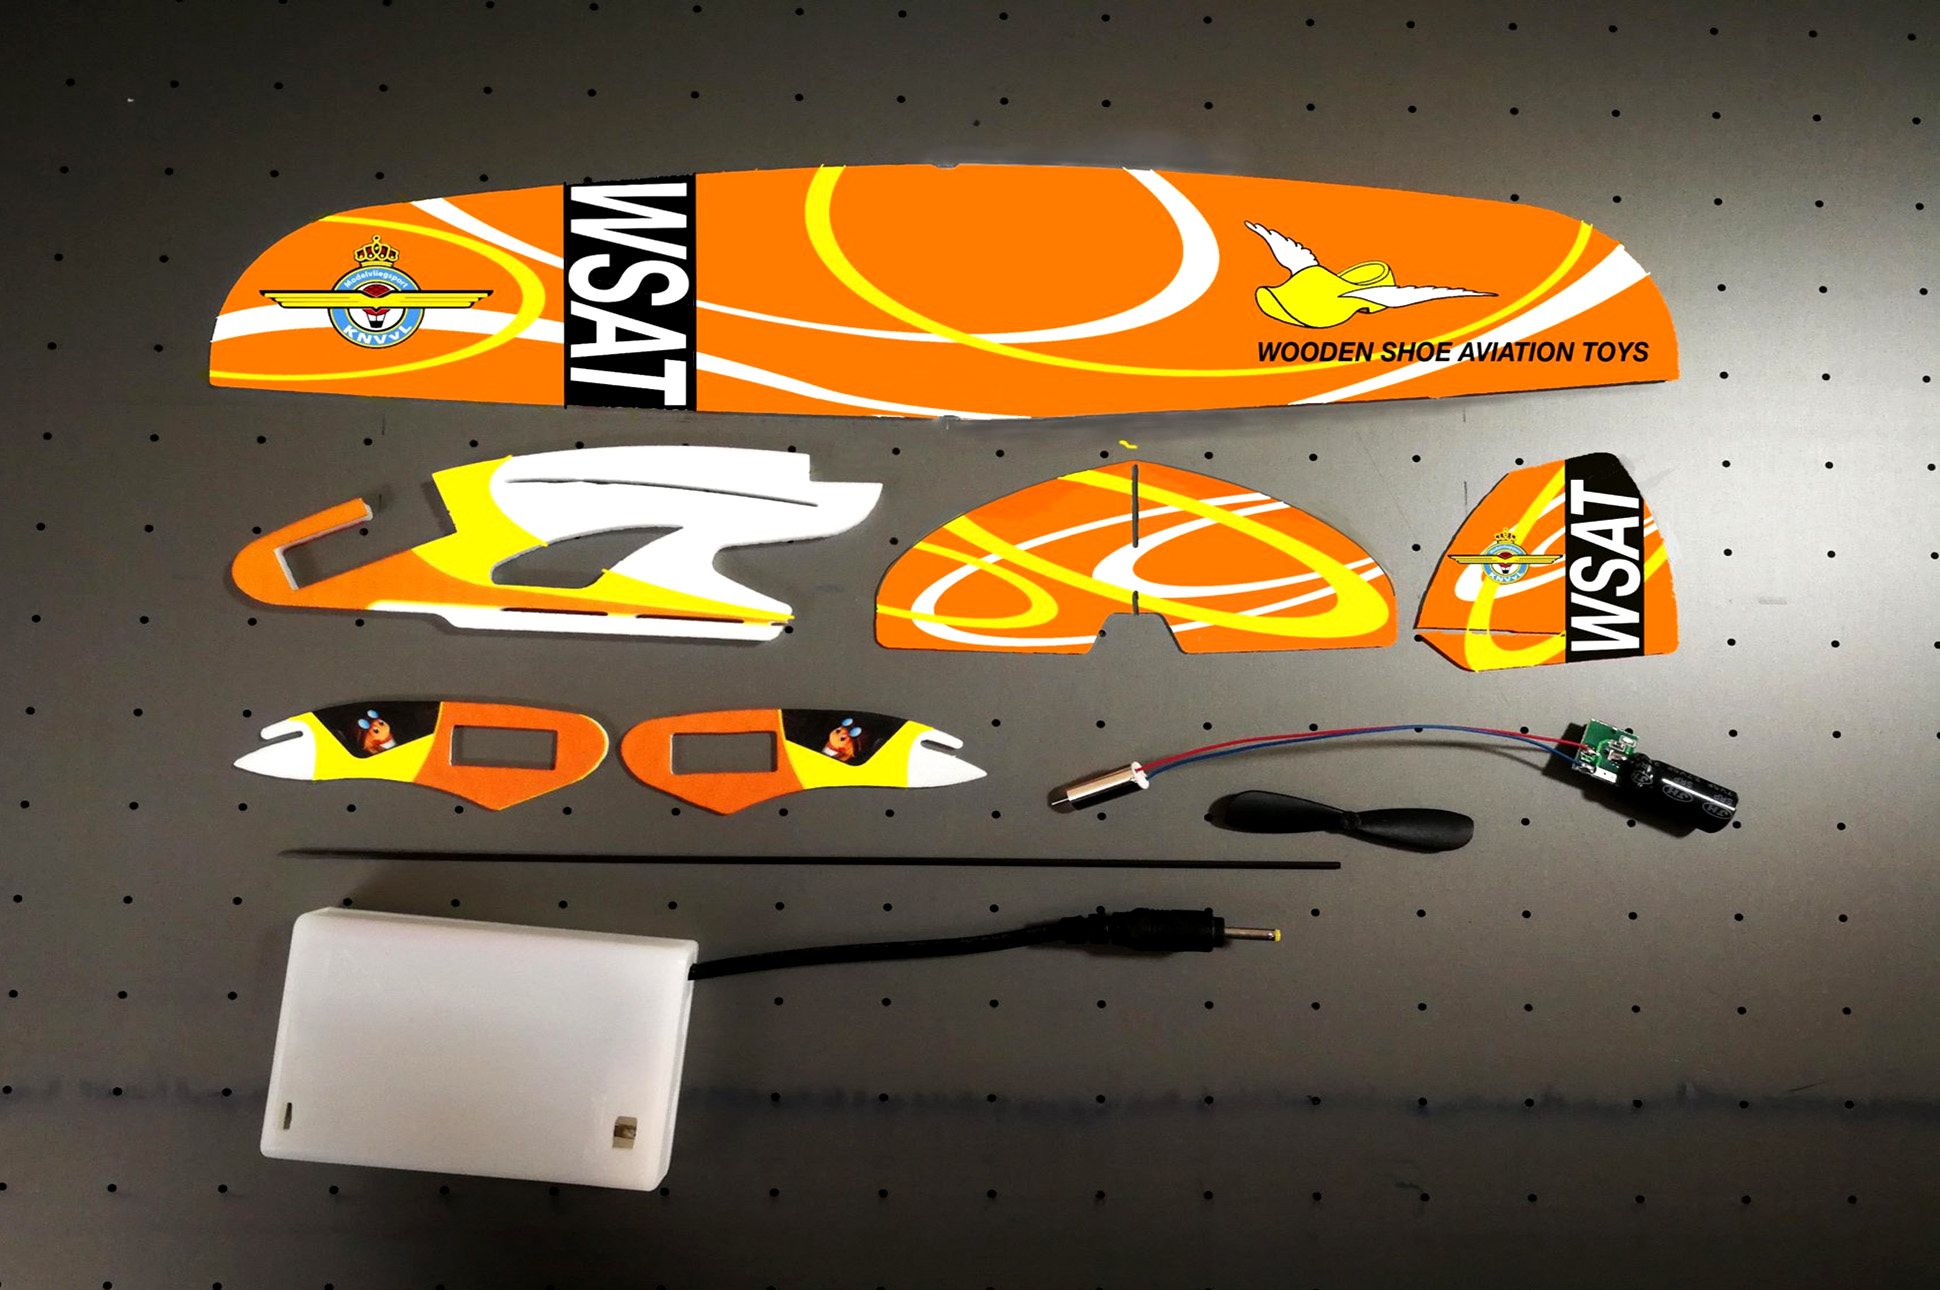 |
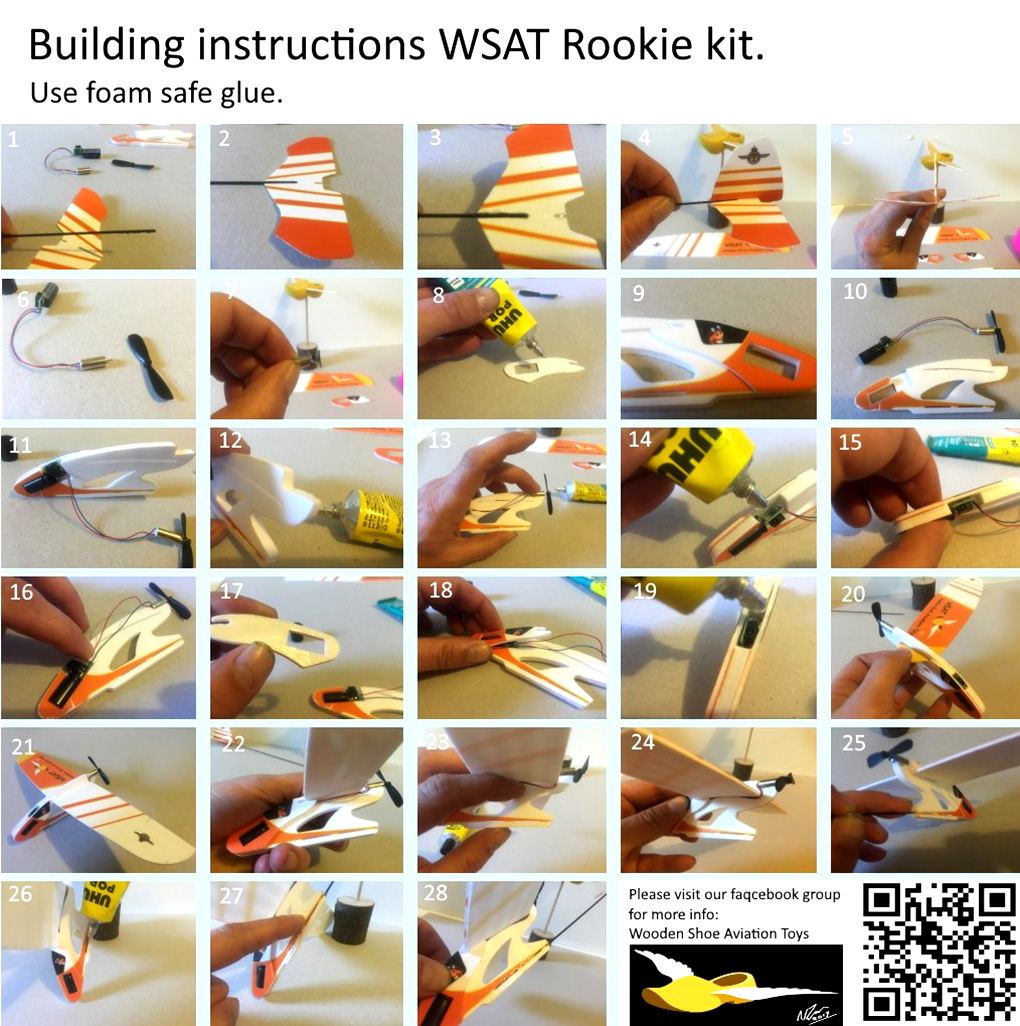
Building Instructions.
The numbers in the photos below correspond to the numbers for these descriptions.
- Add glue to the blunt side of the carbon stick. (Black stick)
- Slide the stabilizer (small wing) neatly with the recess on the stick, make sure that the glue makes contact on both sides.
- Now add glue from the small recess all the way to the front of the stabilizer, don't forget the bottom!
- Now slide the rudder into the recess, over the stabilizer, stick, until the front edge of the rudder is flush with that of the stabilizer. Check that the rudder is glued to the top and bottom of the stick and not next to it.
- Check that everything is square and straight.
- Motor set. Push the propeller onto the shaft, no glue is needed. Make sure the convex side is facing the motor and the shaft is fully inserted.
- The propeller in place. In the photo you can clearly see on which side the convex side is.
- Take the right part of the nose section and add a thin layer of glue over the entire white surface.
- Glue the nose part to the main part of the nose section, making sure the notches for the wing and the rectangle line up nicely.
- Motor set.
- Gently press the capacitor into the rectangle as you can see in the photo. No glue is needed yet.
- Add a good drop of glue where the motor will be, as shown in the picture, and let it dry for about 2-3 minutes.
- Place the motor in place and check that the motor is sitting upright on it, viewed from above and to the side. Make sure the wires come out on the left side of the nose section. It takes a while for the glue to dry, you can use a piece of adhesive tape to hold the motor in place.
- You can apply a drop of glue between the electronics and nose, then turn the capacitor into position as shown on the picture.
- After you have applied the drop of glue, the capacitor must be turned back into position. Do not turn all the way until you hit the nose part, the 1mm gap you can see in the picture is where the glue is.
- Very carefully push the wires into the recesses, it helps to clean up the recesses beforehand with something thin such as a pencil point, ballpoint pen, toothpick etc. Do not use hard or sharp objects to press the wires!
- Spread a thin layer of glue on the left side of the nose section.
- Glue the last part of the nose section in place, check the wires and that all the cutouts line up neatly with each other.
- Look carefully at the photo where this drop of glue should be placed! It is meant to protect the wires. It also provides extra strength for when the plug is pulled out after loading. Be careful not to spill glue in other areas.
- Slide the wing through the recess in the nose piece. Take your time and check the wires carefully before pushing, they can get caught in the cutout and break when you slide through.
- Continue to slide until the wing is nicely in the middle.
- The wires - you can push these, very gently, into the corner of the wing and fuselage.
- Push the wires into the small gap between wing and nose piece. Be careful!
- The wires look fine like this.
- Here you can see where the carbon stick has to be pressed. The cutouts in the nose section will give you some guidance in the direction, but make sure you're going straight in when viewed from above and from the side.
- Check that everything is positioned straight and add glue in the recesses.
- Always nice to do, remove the excess glue with your fingers ....
- But it also makes a bit of a mess ...
- The Rookie kit is finished! Congratulations on your model airplane, we wish you many great flights and a lot of fun!
![]()
Sponsored by:
![]()