Rookie project
Workshop - Manual for supervisors
This manual describes how you as a supervisor can give a good, educational and entertaining Rookie workshop to children aged 8 and over. This manual takes you step by step through the entire process.

Preparation
- A workplace is required for every child, just like it is arranged in schools. Cover the tables to prevent glue or felt-tip pen stains.
- The glue, UHU POR, is available in the good hobby / creative stores, several tubes are useful depending on the number of children. It can be agreed to have the glue supplied by the supplier of the kits. 1 tube per 4-5 children is a reasonable amount.
- Kitchen roll or wet wipes, these will be used frequently by the children to get the glue off their fingers every time! Make sure there is plenty available.
- AA batteries are needed in the white box that charges the Rookie. Each kit needs 3, the AA batteries available at supermarkets are fine. It can also be agreed for the batteries to be delivered by the kit supplier.
- Provide good, clear visibility of the construction description and photos, either printing out or perhaps using tablets or a projector. The building description is available in Dutch and English and is accessible to everyone via a QR code. If desired, this can be delivered in a printed version.
- Some spare rookie kits and parts are always nice to have if something doesn't go according to plan! Preferably put 2-3 extras together, in case one gets lost while flying, for example.
- The children will be thrilled, prepare yourself for this youthful energy and enjoy!
In summary, you need the following:
- Rookie kits
- Covering material for the tables
- Glue
- Wipes/kitchen roll
- AA batteries
- Building description
- Spare Rookie kits
- Enthusiastic attitude
Word of welcome
- After the workplaces have been set up, all children come to take a seat, when everyone is seated, introduce yourself. A short story is enough.
- Clearly state exactly what will happen during the workshop, short and to the point is most effective! Learning, building, flying are the 3 key points. If possible, take the opportunity to show a short video of the Rookie in action. Ask the children if they already know anything about airplanes, let them ask some questions as well.
- Start of the workshop.
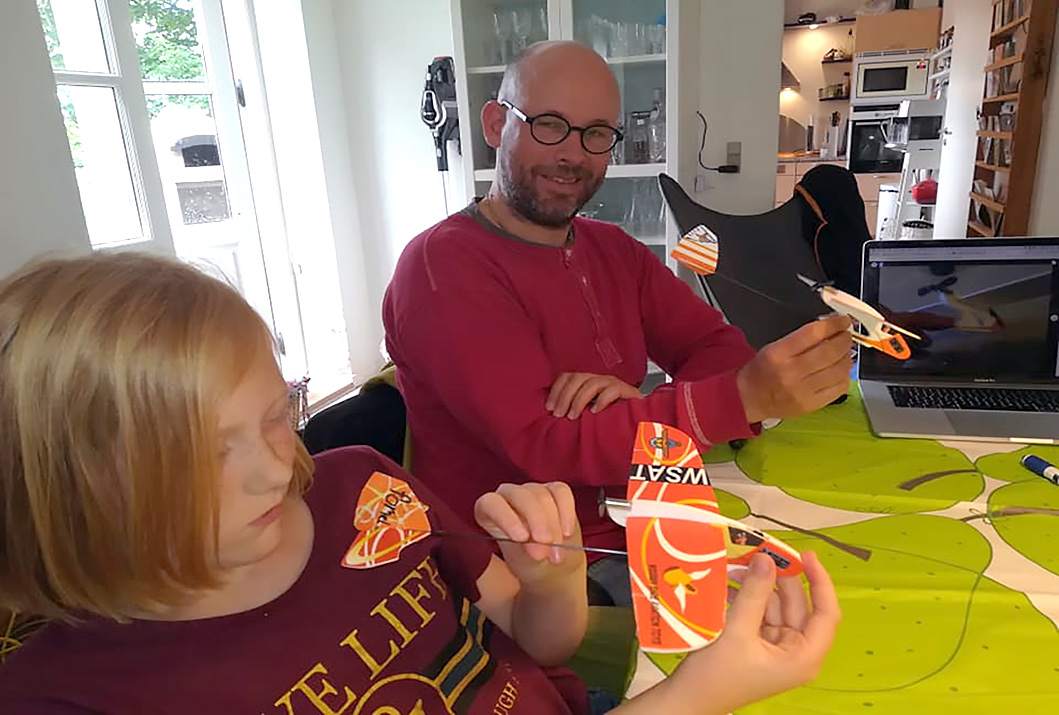
- Explain what the children have in their workplace and have them open the box containing the kit. Check the contents together on the basis of the parts list / photo enclosed with the construction description.
- Let the children do a puzzle with the parts, meanwhile tell them that everyone can glue this together and that the supervisors are there to assist. Emphasize that the children are going to do it themselves.
Display the parts together in the workplace and then draw attention to an important announcement; the glue.
This glue is harmful if you get it in your eyes or mouth. It is therefore important to clearly explain the following rule to the children: First apply glue, spread with your finger, immediately clean your finger with the cloths/wipes and then glue the parts together.
Show this before the glue is distributed and do this every time when something can be glued again.
- It is the intention that you first show yourself how to glue at each construction step. Explain that too much glue results in very long drying times and a grease box. Too little glue results in a weak construction.
Hand out the tubes of glue to the children and let them view the building description.
Building
 |
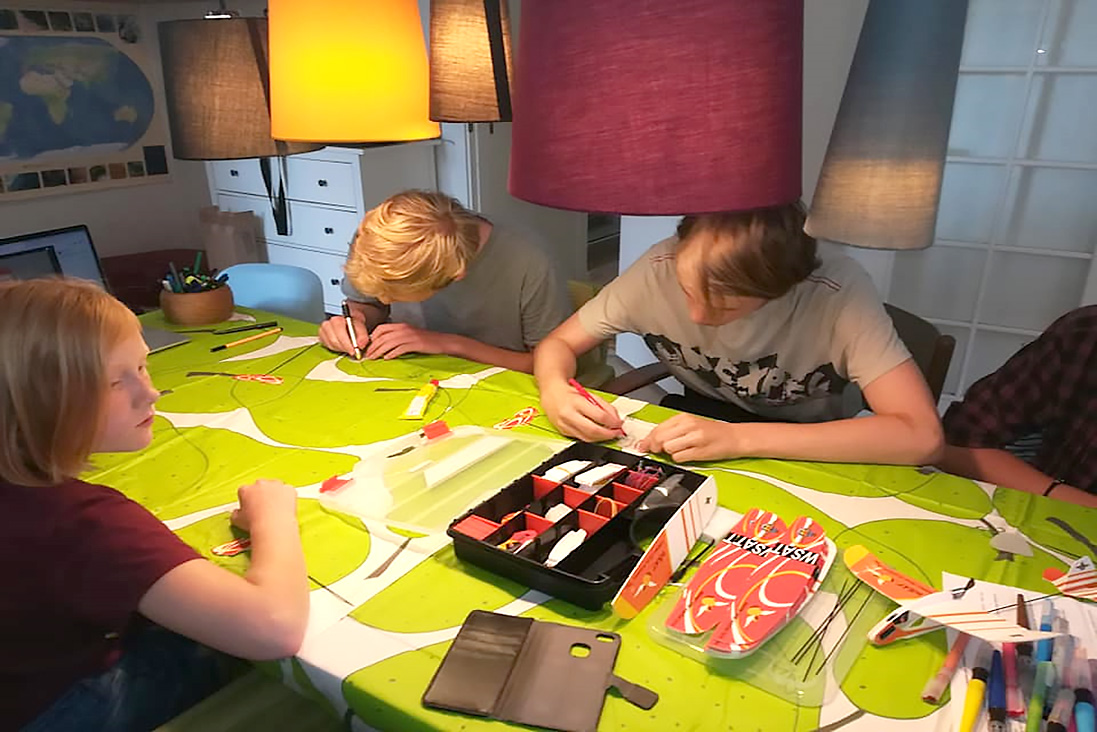 |
Have the children write their name on the underside of the wing with marker pens, this will come in handy later while flying.
The building description is available in Dutch and English. The numbers in the photos correspond to the numbers for the text.
The combination of text, images and your explanation make it possible to use the English language if desired (the general language in aviation!) in a modest way in this workshop.
When you follow the steps as in the pictures, while the kids are sticking, you have the chance to explain the function of the parts that are currently being glued.
- Tail parts
You can use it to adjust the direction of the Rookie and ensure stability. - Hull/fuselage
Firmly connect the wing to the tail. - Nose sharing
For balance, sturdiness and space for pilot or equipment. - Wing
Most important part to be able to fly, tell a short story about the operation, give examples using movements with a loose wing in your hand. Let the kids do experience this too. If desired, use a fan to simulate the wind, making sure to keep enough distance from the fan. - Motor kit
Necessary to provide the Rookie with propulsion for an extended period of time. Briefly explain how a propeller works.
The system that the Rookie kit features justifies a brief explanation of the energy transfer from the AA batteries, through the capacitors and finally to the motor with propeller.
Explain that the energy required to power an aircraft always carries weight, which means there is always a compromise which creates technical challenges, certainly in aviation! If you wish, you can add simple calculations when the children are ready for this.
* Before the motor sets are glued, it is important to check them first!
Flying
Before flying it is important to clarify the setting of the Rookie with simple illustrations. You can draw different rudder adjustments and explain the corresponding effect.
After this, it is time to communicate the rules for fun and safety. Be as clear as possible and emphasise the consequences; ie. the Rookie gets lost, gets caught in a tree, or flies out of sight.
Safety
Be careful with long hair and spinning propellers, no matter how small! Should it happen, pull the propeller off the shaft to untangle the hair.
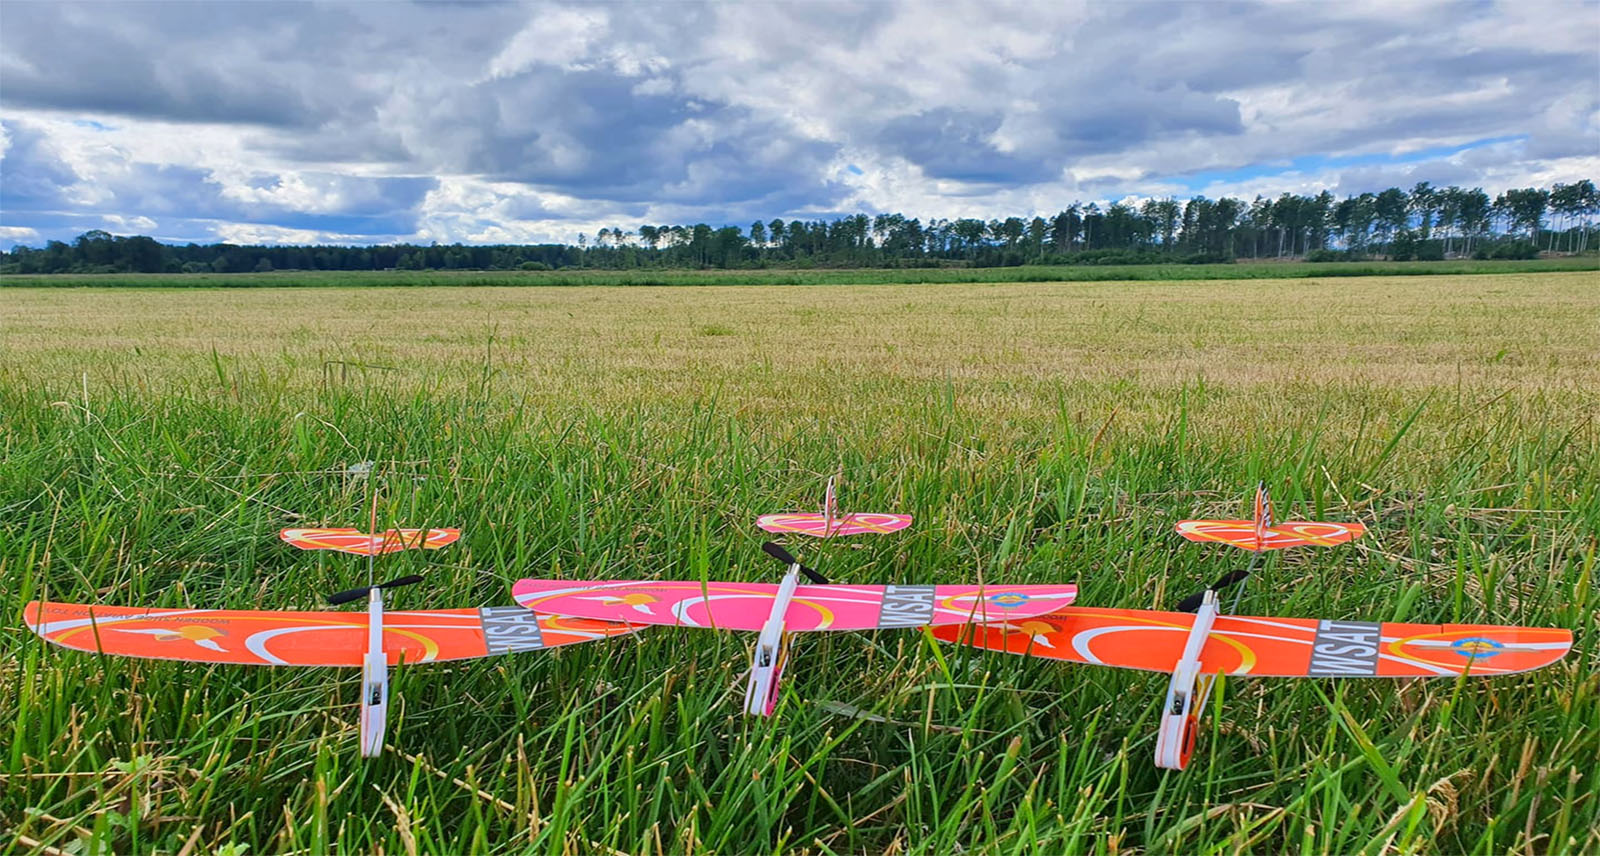
Another important aspect of safety is location, especially when flying outside. Provide a fairly large open field with as few obstacles as possible such as trees, buildings, roads or water around it.
Always go as far upwind as possible in the appropriate field and use this spot as the starting point for every flight!
This is because the wind always carries the Rookie in the same direction. With a reasonable wind this can result in flight distances of a few hundred metres! So always walk back to the starting place after your flight.
Start your first flight with only a little power: a 2-3 second charging time is enough for a first test flight, especially with new batteries! If you charge for longer than 3 seconds, there is a chance that your Rookie will simply '' fly away '', literally out of sight or somewhere high in a tree.
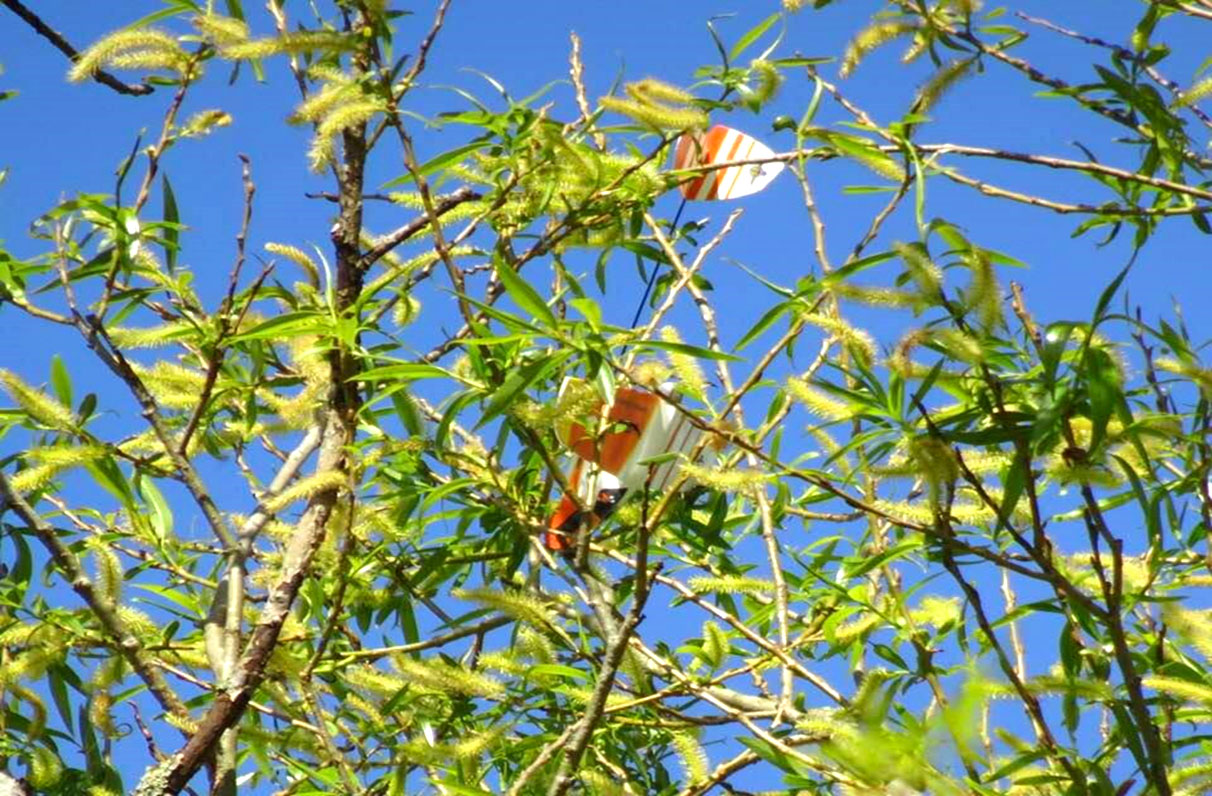
Keep your eyes on your Rookie at all times when it is flying; the model is not very big and does not stand out in tall grass and bushes, running right after it is a very good idea!
As a supervisor, it is important to carefully explain the above points before departure to the flying site, with the emphasis on the consequences. Repeat these points immediately as soon as you arrive at the location with the children. To ensure fun it is very important for the kids to understand that this is necessary to keep your Rookie, the flying gods are unrelenting.
Also explain this when the Rookie is going to be flown indoors; when the children get the Rookie home they will benefit greatly from the information and warnings when taking the Rookie to fly outside.
When flying indoors, some warnings are not relevant, any collisions the Rookies make cannot hurt anyone and the Rookie is designed to withstand harsh handling.
The first flights
After this part of the workshop, the need to finally see the Rookies take to the air has grown, things need to be tested.
For that reason, we start by demonstrating a setup where the Rookie makes spectacular loops, be it a corkscrew or in aviation language; a roll.
The logical consequence is that the Rookies make a spectacular but especially short flight. Show how far and high the Rookie goes when you charge it for more than 3 seconds. After this short demonstration, you hand out the batteries to the children.
Let the fun begin, a jumble of Rookies flying around and playing antics is what is supposed to happen. Let the kids play. Rookies will be sacrificed to the flying gods, so you have spare Rookies with you!
Gradually there will be a need for the children to see how long you can let your Rookie fly. This moment usually occurs 10 to 20 minutes after the flight has started.
A very good time to gather the children again and demonstrate a good set-up for a long flight. Help children with that adjustment and motivate them to make the model fly properly. If necessary, a kind of fun competition can take place where everyone starts at the same time and flies as long as possible. You can also do a round with spectacular flights where as many loops as possible can be made, countless possibilities for you as a supervisor to give it a nice twist. Give the children time to enjoy their Rookie and the knowledge you have taught them.
Closure of the workshop
Get all the children together and organise an "all up launch". Professional jargon for a joint launch of all Rookies at once, an entertaining last flight for all, photo moment for parents, supervisors, CIAM/FAI.
After returning to the classroom with the children, give a short "debriefing". The children get the chance to brag about the ten loops or more than 50 metres in height. Ask if they have an idea why this came about and if necessary, give additional info on the answers you receive.
Ask in general if there are any questions left and give each child the opportunity to ask when they have.
Mention once more all the points to keep in mind when flying outside!
Wish the children a lot of fun with the things they learned, the Rookie and many more beautiful flights.
![]()
Sponsored by:
![]()